Multi screen interaction – How to set up dual or multi screen display on a computer?
With the development of technology, multi screen display has become a common configuration in modern computers. Multi screen display can greatly improve work efficiency and also bring more possibilities for entertainment. Below, the editor will provide a detailed introduction to how to set up dual or multi screen displays on a computer, helping you easily meet your multi screen display needs.
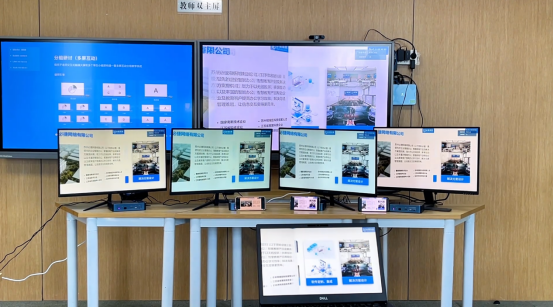
Multi screen display refers to the simultaneous distribution of output signals from a computer to two or more displays, achieving the splicing of multiple display screens. Multi screen display can improve work efficiency and also bring more possibilities for entertainment.
How to set up dual screen display on a computer
The steps to set up dual screen display are relatively simple, and you can follow the following steps:
- Connect the monitor; Firstly, connect the two monitors to your computer. Generally speaking, you need to connect one monitor to the HDMI or DisplayPort interface on the graphics card, and another monitor to the HDMI or DisplayPort interface on the integrated graphics card on the motherboard. If your computer only has one monitor interface, you will need to purchase a converter or adapter to connect to the second monitor.
- Enter system settings; After turning on the computer, enter the operating system. The steps to enter system settings vary depending on the operating system you are using. Generally speaking, you can enter the system settings by pressing the “Win+P” key combination or right clicking on an empty space in the taskbar and selecting the “Projection” option.
- Select display mode; In the system settings, you will see multiple display mode options, such as “Copy” (two screens display the same content), “Extend” (two screens display different content), and “Projector only” (display content only on one display). Choose the appropriate display mode according to your needs.
- Adjust the display arrangement; After selecting the display mode, you can adjust the order of display icons by dragging them. Generally speaking, you can place one monitor on the main screen and another monitor on the secondary screen.
- Adjust resolution and scaling ratio; After adjusting the display arrangement, you need to adjust the resolution and scaling ratio of each monitor separately. In the Windows system, you can adjust the resolution and zoom ratio by right clicking on an empty space on the desktop and selecting the “Display Settings” option. In the Mac system, you can adjust the resolution and scaling ratio through the display options in the system preferences.
- Save settings; After completing the above steps, you need to save your settings. In Windows systems, you can save settings by pressing the “Win+P” key combination. In Mac systems, you can save settings through the display options in system preferences.
How to set up multi screen display on a computer
The steps for setting up multi screen display are similar to those for setting up dual screen display, except that more connection cables are required when connecting the monitor. The following are the general steps:
- Connect the monitor; Firstly, connect multiple monitors to your computer. Generally speaking, you need to connect one monitor to the HDMI or DisplayPort interface on the graphics card, and another monitor to the HDMI or DisplayPort interface on the integrated graphics card on the motherboard. If your computer only has one monitor interface, you will need to purchase a converter or adapter to connect to the second monitor. If you need to connect more monitors, you will need to purchase more converters or adapters.
- Enter system settings; After turning on the computer, enter the operating system. The steps to enter system settings vary depending on the operating system you are using. Generally speaking, you can enter the system settings by pressing the “Win+P” key combination or right clicking on an empty space in the taskbar and selecting the “Projection” option.
- Select display mode; In the system settings, you will see multiple display mode options, such as “Copy” (multiple screens displaying the same content), “Extend” (multiple screens displaying different content), and “Projector only” (displaying content on only one display). Choose the appropriate display mode according to your needs. If you need more display mode options, you can consider installing third-party software to implement them.
- Adjust the display arrangement; After selecting the display mode, you can adjust the order of display icons by dragging them. Generally speaking, you can place one monitor on the main screen and the other monitors on the secondary screen. If you need more arrangement methods, you can consider using third-party software to achieve it.
- Adjust resolution and scaling ratio; After adjusting the display arrangement, you need to adjust the resolution and scaling ratio of each monitor separately. In the Windows system, you can adjust the resolution and zoom ratio by right clicking on the blank space on the desktop and selecting the “Display Settings” option; In Mac systems, resolution and scaling can be adjusted through the display options in system preferences. If you need more resolution and scaling options, you can consider using third-party software to implement them.
- After completing the above steps, you need to save your settings. In the Windows system, you can save the settings by pressing the “Win+P” key combination; In Mac systems, you can save settings through the display options in system preferences. If you need more save options, you can consider using third-party software to achieve this.