Compared to Windows 10, Windows 7 has relatively fewer features and cannot directly call Miracast’s wireless projection function, nor can it be directly connected to the wireless projector.
To enable the projection function of Windows 7 computers, we need to use other projection devices, and Bijie Multimedia Collaboration System is one of the options.
For Win7 system computers, the Bijie Multimedia Collaboration System can be used for wireless screen projection, with the following steps:
- Connect the computer and Bijie devices to the same local area network.
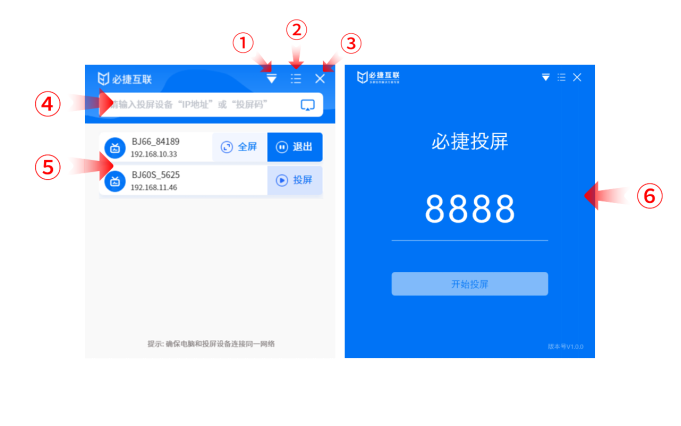
- Install the “Bijie Screen Projection” client on the computer, open the scan QR code or enter the screen projection code to start screen projection.
- The PC client will automatically scan for host devices that can be used for screen mirroring. If there are no hosts in the list that require screen mirroring, you can click on the input box to manually add an IP and select a screen mirroring host.
- Click “Settings” to adjust the screen projection parameters.
In addition, when projecting the screen, pay attention to the device connection and check if the computer and TV are connected to the same WiFi. When casting, it is also necessary to pay attention to the resolution and audio output settings of the screen to ensure a good casting effect.
The above information is for reference only. If you have any questions or operational issues, it is recommended to consult Bijie customer service or professional technical personnel.