How to set up and use Miracast on Windows 10
Want to mirror your PC screen to another TV or Projector wirelessly? Well, you can easily do so using the Miracast technology. It is easy, quick and secure. This tutorial will guide you on how to set up & use Miracast on Windows 10.

What is Miracast
Miracast is a standard for wireless connections from devices like laptops, tablets, smartphones, etc. , to external displays like TVs or monitors. It can broadly be described as “HDMI over Wi-Fi”, replacing the cable from the device to the display.
Nowadays Miracast support comes built into the device, and it was first offered in Windows 8.1. With Miracast, you can easily create a wireless connection between your computer and other display devices such as Monitors, TVs, and Projectors. Miracast allows sending up to 1080p HD video (H.264 codec) and 5.1 surround sound which is more than enough for average users.
How to check if Miracast is supported on your device
Press ‘Win+R’ on your keyboard and then type in ‘dxdiag’ and hit Enter.
Press the ‘Save all Information’ button located at the bottom and save the text file at the desired locations.
Now open the text file and look for ‘Miracast’ and next to it will be the current availability status.

Set up & use Miracast on Windows 10
Step 1: If your TV comes with built-in Miracast support, then turn it On. Else connect the external adapter into the HDMI port of your television and power it on.
Step 2: Now on your Windows PC, navigate to Start -> Settings -> Devices -> Connected Devices.
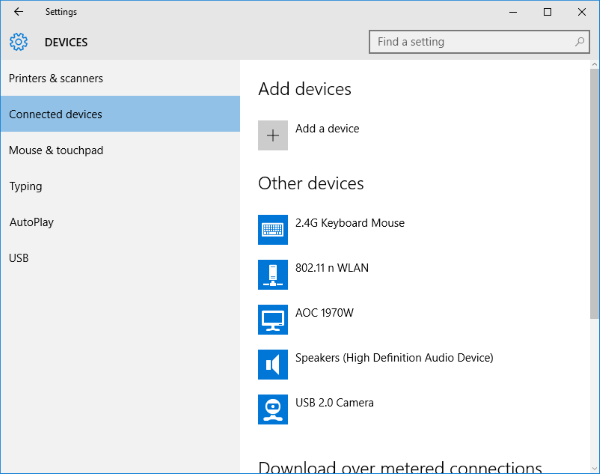
Step 3: Click on ‘Add a Device’ and wait for the adapter to appear in the list. Click on the receiving adapter and that’s all. You’ve set up the wireless display.
You can now configure both the displays by pressing ‘Win+P’ and selecting a relevant option.
If that does not work for you, repeat the steps again and check.