Smart Classroom – How to project a computer onto the smart classroom display screen?
Method 1:
1.Please prepare a VGA or HDMI cable and an external display screen in advance.
2.Connect the external display screen to the computer using a connecting cable.
3.Use the combination keys “win”+”P” to set the display mode.
4.There are four display modes available, and you can freely switch between the computer and the TV according to your actual needs. Firstly, you can directly connect the computer and the TV through an HDMI cable. Secondly, if the computer is a Win10 system, you can connect the computer and the TV to the same network. Right click on the file you want to project and select Play to Device to achieve screen projection.
Method 2:
Chromecast – The most reliable method. If you find using cables troublesome, you can try Chromecast.
1.Search for ‘Google Cast’ in the Google Home store and install it as an extension.
2.Open a new window in the browser and click the ‘Project’ button.
3.Finally, when the laptop detects an external device, search for the TV and click to make a selection.
4.This will successfully connect the computer to the TV.
Although Chromecast is great, as it operates through WiFi, if the WiFi environment is not good, there may be delays or low image quality.
Method 3:
Miracast – The most popular method. If you are not satisfied with Chromecast, I would like to recommend another wireless connection method – Miracast technology.
1.Go to computer settings and click on ‘Devices’.
2.Next, select ‘Connected Device’ and click ‘Add Device’.
3.Wait for the computer to complete detecting the device and click on your TV from the available options.
4.If your computer is not automatically connected to the TV, right-click and select ‘Picture Settings’.
5.Afterwards, set multiple screens to ‘Copy these screens’ and click’ Connect to wireless screen ‘.
6.As long as the TV is detected, clicking the “Connect” button can project the computer screen onto the TV.
Although Miracast has made significant breakthroughs in connectivity, there are still some issues. Firstly, it cannot be continuously displayed, and so far, no one has come up with a solution. Then, there may be some delay between the computer and the TV. Finally, it cannot support multitasking.
Method 4:
1.Click Control Panel Network and Internet Network Sharing Center; Select ‘Change Advanced Sharing Settings’ and follow the wizard to establish a home network.
2.The specific introduction is as follows: Open the computer’s 【 Control Panel】, find 【 Network and Internet】-【 Network Sharing Center】;
3.Click on ‘Change Advanced Sharing Settings’ in the upper left corner, and then follow the wizard to establish a home network;
4.After the homegroup is established, right-click on the video or image, select ‘Play to Device’, and the TV model ID will appear. Click to cast the screen.
Note that this method only applies to wireless screen projection between Win7/Win10 and Android system devices.

Method 5:
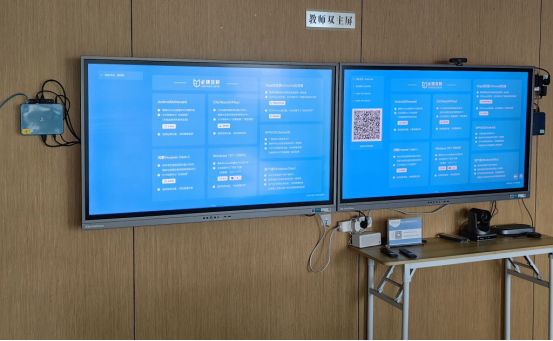
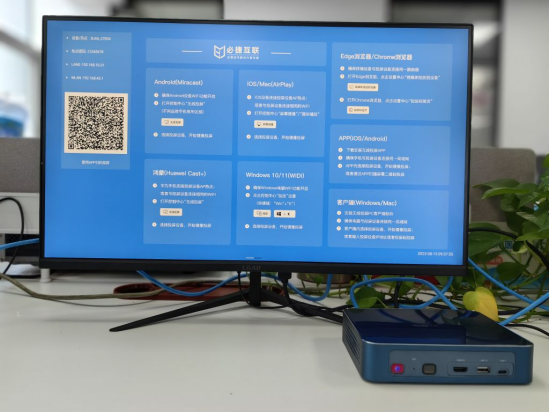
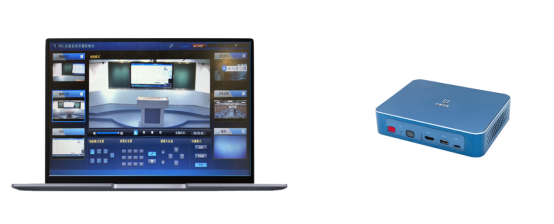
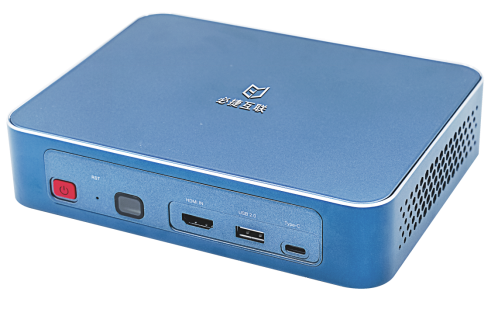
The above four methods can all project the teacher’s computer onto multimedia, but they all have their drawbacks. Here, we recommend the Bijie wireless screen projector. The BJ66 interactive version with multi machine linkage function is very suitable for multimedia classrooms in universities.
1.Connect the Bijie wireless projector with the classroom display screen using an HDMI cable;
2.Then open the computer, use the shortcut keys win+P, and select the screen projection type;
3.Afterwards, click on the Bijie Wireless Screen Projector ID to complete the screen projection.
The Bijie wireless screen projector supports screen projection protocols such as Miracast, AirPlay, WiDi, Googlecast, HUAWEIcast+, and can be used on both Android and iOS devices. In addition, it also includes various practical functions such as information publishing, web page projection, group streaming, multi channel projection, projection control, and weak network confrontation.