To turn your PC into a Miracast receiver, just open Windows 10’s Start menu and open the “Connect” app. If you don’t see this app, you need to upgrade to the Anniversary Update.
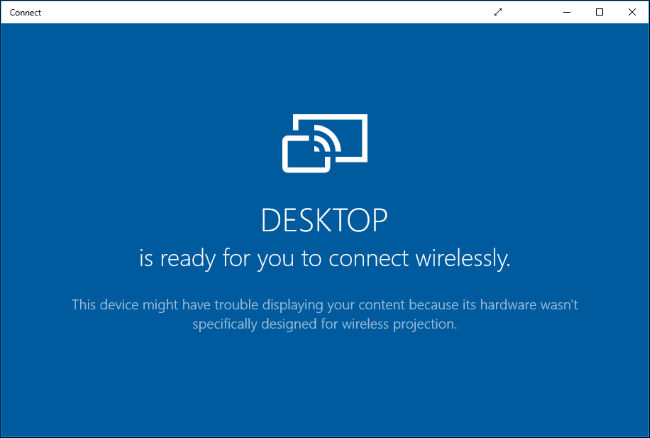
With the app open, you’ll see a message that your PC is now ready for you to connect wirelessly. That’s it. You don’t need to mess with any firewall or network server settings. Just open the app whenever you want to cast.
On most PCs, you’ll likely see a “This device might have trouble displaying your content because its hardware wasn’t specifically designed for wireless projection” message. The application will still work, but it would likely work better if the PC’s hardware and hardware drivers was specifically designed to function for wireless projection.
How to Cast From Another Windows 10 PC
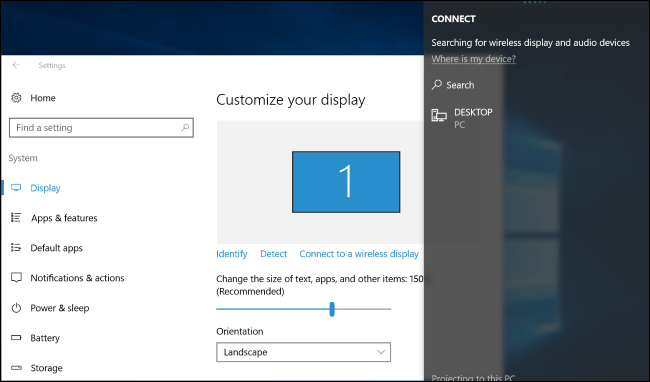
To connect from another PC running Windows 10, head to Settings > Display on that PC and select “Connect to a wireless display”. This setting should be in the same place on a phone running Windows 10 Mobile.
The PC running the Connect app should appear in the list. Click or tap it to connect.
After it connects, you’ll see a few more settings. Enable “Allow input from a keyboard or mouse connected to this display” and the PC functioning as the receiver will be able to interact with the PC through the Connect app.

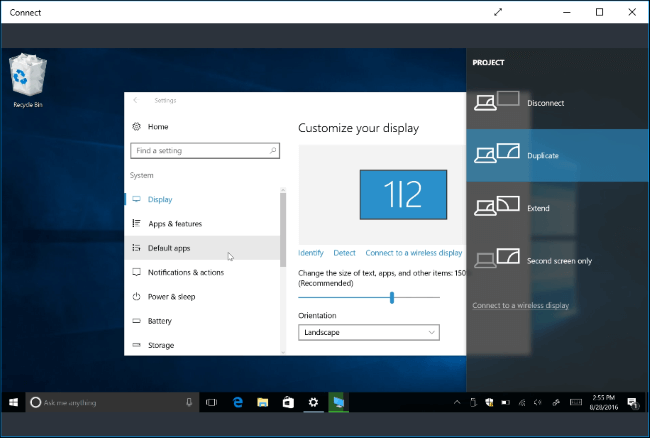
To change the project mode, select “Change projection mode”. By default, it functions in “duplicate” mode and duplicates the contents of your screen. You can instead choose to extend the screen and treat the remote display as a second monitor, or only use the second screen.
Whichever option you choose, you can enable full-screen mode by clicking the “full screen” button on the window title bar.