Miracast is a wireless technology that projects the image from your computer screen onto another monitor, TV screen, projector, or streaming media player that also supports Miracast. You can use this to share what you’re doing on your computer, present a slide show, or even play your favorite game on a larger screen.
Use the information in this document to connect your Miracast devices.
Step 1: Getting your devices ready
Determine if your computer and wireless display support Miracast technology.
Step 2: Projecting your screen
When you have determined that both your computer and wireless display support Miracast, project your screen.
-
Make sure your computer is connected to a network and the display you want to connect to is turned on.
-
In Windows, click the Action Center icon
 on the taskbar, and then click Connect.
-
Wait while the computer searches for wireless display devices, and then select the wireless display you want from the search results.

-
Wait while Windows connects the display.

-
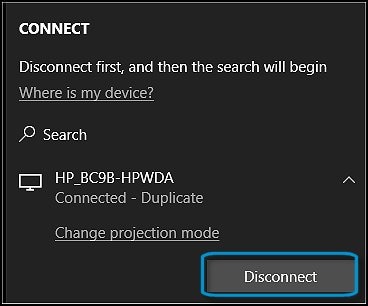
When the connection is complete, Windows shows the projection mode.If you want to change this setting, select Change projection mode.

-
On the Project screen display, select the projection mode you want.
 The following modes are available when projecting from a computer to an external display.
-
PC screen onlyEverything displays on your main screen, the connected screen remains blank.
NOTE:
When you are connected to a wireless projector, this option changes to Disconnect. -
DuplicateThe same image displays on both screens. This is also called mirroring.
-
ExtendThe image is spread over both screens, and you can drag and move items between both screens.
-
Second screen onlyEverything displays on the connected screen. Your main screen is blank.
-
-
To disconnect the connected display, click Disconnect on the Connect screen.If you move your computer beyond the range of the wireless display, or if your computer goes into sleep or hibernate mode, the two devices disconnect.